GROMACS Installation with CUDA

Benchmarking – GROMACS

How to install

wget https://ftp.gromacs.org/gromacs/gromacs-2021.2.tar.gz

tar -xvf gromacs-2021.2.tar.gz

source /data/setenv


wget https://github.com/Kitware/CMake/releases/download/v3.20.3/cmake-3.20.3.tar.gz

tar -xvf cmake-3.20.3.tar.gz

cd cmake-3.20.3

./configure –prefix=pwd

make -j 8

make install

export PATH=<path-to-cmake>/bin:$PATH

cd gromacs-2021.2

mkdir build

cd build

cmake ../ -DGMX_OPENMP=ON -DGMX_MPI=ON -DCMAKE_BUILD_TYPE=Release -DGMX_GPU=CUDA -DGMX_USE_NVML=ON -DGMX_CUDA_TARGET_SM=80 -DGMX_CUDA_TARGET_COMPUTE=80 -DGMX_DOUBLE=off -DGMX_BUILD_OWN_FFTW=ON -DCMAKE_INSTALL_PREFIX=/home/anisha/GROMACS/GROMACS_CUDA_AWARE_MPI

make -j 8

Posted in Uncategorized | Leave a comment

Installation of elk-3.1.12 using Intel mpi, intel mkl , intel fft

Contents

  1. Installation steps
  2. Execution
  3. Known error and solutions
  4. References
  1. Installation steps
  • Download the tar from the following link

Link : http://sourceforge.net/projects/elk/?source=typ_redirect

  • Untar the downloaded file

tar -xzvf elk-3.1.12.tgz

  • cd elk-3.1.12
  • ./setup

(choose the option Intel Fortran (ifort) with OpenMP)

  • Download the libxc

http://www.tddft.org/programs/octopus/wiki/index.php/Libxc

  • tar -xzvf  libxc-2.2.2.tar.gz
  • cd libxc-2.2.2
  • ./configure –prefix=….
  • make
  • make check
  • make install
  • Now copy the libxc libraries to the elk/src directory

– cp libxc_2.2.2/lib/libxcf90.a elk-3.1.12/src/

– cp libxc_2.2.2/lib/libxc.a elk-3.1.12/src/

  • Now copy the intel mkl fft libraries to the elk/src directory

–  cp /opt/intel/mkl/include/mkl_dfti.f90 elk-3.1.12/src/

  • Now following is the make.inc after modifications


MKLROOT = /opt/intel/mkl
MAKE = make
F90 = mpiifort
F90_OPTS = -O3 -ip -openmp -I$(MKLROOT)/include -mkl
F77 = mpiifort
F77_OPTS = -O3 -ip -openmp -I$(MKLROOT)/include -mkl
AR = ar
LIB_SYS =
LIB_LPK = -Wl,–start-group $(MKLROOT)/lib/intel64/libmkl_intel_lp64.a $(MKLROOT)/lib/intel64/libmkl_core.a $(MKLROOT)/lib/intel64/libmkl_intel_thread.a -Wl,–end-group -lpthread -lm -openmp -lfftw3xf_intel
SRC_MPI =
LIB_libxc = libxcf90.a libxc.a
SRC_libxc = libxc_funcs.f90 libxc.f90 libxcifc.f90
SRC_FFT = mkl_dfti.f90 zfftifc_mkl.f90


  • Now compile

– make clean

– make all

  • Now the package is ready to use

2. Execution

cd elk-3.1.12/tests

sh tests.sh

4. References

  1. http://www5.hp-ez.com/hp/calculations/page134
Posted in Uncategorized | Leave a comment

Quantum Espresso 5.0.2 GPU 14.03.0 , 64 bit

Contents

  1. Installation steps  Quantum Espresso 5.0.2 GPU 14.03.0
  2. Execution
  3. Known error and solutions
  4. References
  1. Installation steps

1.1 Download the followings

– espresso-5.0.2 and respective modules from below url

http://qe-forge.org/gf/project/q-e/frs/?action=FrsReleaseBrowse&frs_package_id=18

– Download espresso GPU patch file , we used QE-GPU v14.03.0

https://github.com/fspiga/QE-GPU or https://github.com/fspiga/QE-GPU/releases

1.2 Untar the files

$mkdir espresso-5.0.2-gpu-14.03

$ cd espresso-5.0.2-gpu-14.03

$ tar -xvf espresso-5.0.2.tar.gz

$ tar -xvf QE-GPU-14.03.0.tar.gz

$ cd espresso-5.0.2

copy all downloaded *5.0.2 into espresso-5.0.2/archive directory

1.3 Apply the GPU patch

$ cp -r  QE-GPU-14.03.0/GPU  .

$rsync -r –exclude=.git ./GPU espresso-5.0.2-gpu-14.03/espresso-5.0.2

$ cp QE-GPU-14.03.0/qe-patches/espresso-5.0.2/espresso-5.0.2_GPU-14.03.patch .

$ patch -p1 < espresso-5.0.2_GPU-14.03.patch

$ cd GPU

1.3 Configure

$export PATH=/opt/CUDA-5.5/bin:$PATH

$export LD_LIBRARY_PATH=/opt/CUDA-5.5/lib64:$LD_LIBRARY_PATH

$./configure –prefix=espresso-5.0.2-gpu-14.03/espresso-5.0.2 MPIF90=mpiifort FC=mpiifort F77=mpiifort F90=mpiifort CXX=mpiicpc CC=mpiicc BLAS_LIBS=”-L/opt/intel/composer_xe_2013.1.117/mkl/lib/intel64 -lmkl_intel_ilp64 -lmkl_intel_thread -lmkl_core -liomp5 -lpthread -lm” LAPACK_LIBS=” ” FFT_LIBS=”-L/opt/intel/composer_xe_2013.1.117/mkl/lib/intel64″ SCALAPACK_LIBS=”-lmkl_scalapack_ilp64 -lmkl_blacs_intelmpi_ilp64″ –enable-parallel –enable-openmp –with-scalapack=intel –enable-cuda –with-cuda-dir=/opt/CUDA-5.5 –without-magma –with-phigemm

1.4 Compilation

$ cd espresso-5.0.2-gpu-14.03/espresso-5.0.2

1.4.1 Modify the make.sys file as per your system environment, for my setup following are the modification

## Add manual flags

44 MANUAL_DFLAGS = -D__ISO_C_BINDING -D__DISABLE_CUDA_NEWD -D__DISABLE_CUDA_ADDUSDENS

## modify D_FFTW to D_FFTW3

45 DFLAGS = -D__INTEL -D__FFTW3 -D__MPI -D__PARA -D__SCALAPACK -D__CUDA -D__PHIGEMM -D__ OPENMP $(MANUAL_DFLAGS)

## Add -DMKL_ILP64 ,-i8 , remove -openmp

83 CFLAGS = -DMKL_ILP64 -O3 $(DFLAGS) $(IFLAGS)
84 F90FLAGS = $(FFLAGS) -nomodule -fpp $(FDFLAGS) $(IFLAGS) $(MODFLAGS)
85 FFLAGS = -i8 -O2 -assume byterecl -g -traceback -par-report0 -vec-report0

90 FFLAGS_NOOPT = -i8 -O0 -assume byterecl -g -traceback

LDFLAGS = -ilp64

1.4.2. Compile with following command

$ make -f Makefile.gpu all-gpu 2>&1 | tee make.log

2. Execution

2.1 Execution

# Number of processes per node should be equal to number of GPUs per node.

mpirun -np 4 -perhost 2 /opt/app/espresso-5.0.2-gpu-14.03/espresso-5.0.2/bin/pw-gpu.x -in ./BN.in

2.2 Verification

# Run the following command on the system on which QE-gpu is running. The command will show you the processes running on GPUs

$nvidia-smi

3. Known error and solutions

3.1. Error :

iotk_print_kinds.o: In function `main’:
/opt/app/espresso-14.03.0-gpu/espresso-5.0.2/S3DE/iotk/src/iotk_print_kinds.f90:1: undefined reference to `__kmpc_begin’
/opt/app/espresso-14.03.0-gpu/espresso-5.0.2/S3DE/iotk/src/iotk_print_kinds.f90:4: undefined reference to `__kmpc_end’
make[2]: *** [iotk_print_kinds.x] Error 1
make[2]: Leaving directory `/opt/app/espresso-14.03.0-gpu/espresso-5.0.2/S3DE/iotk/src’
make[1]: *** [libiotk] Error 2
make[1]: Leaving directory `/opt/app/espresso-14.03.0-gpu/espresso-5.0.2/install’

Solution : remove “-openmp” flag from make.sys file.

4. References

4.1 http://qe-forge.org/gf/project/q-e/frs/?action=FrsReleaseBrowse&frs_package_id=18

4.2 https://github.com/fspiga/QE-GPU

4.3 https://github.com/fspiga/QE-GPU/releases

Posted in Uncategorized | Leave a comment

Widely used measurement units in computing world

There are lots of widely and frequently used measurement units in the computing world. Even after frequent use, many of us use these units wrongly. Here wrongly I mean to say,  that the way shorthand notations of units need to be written is not proper. This may happen due to the ambiguity that we have.  The units that we are talking about are very general units used in the computing world like bits, bytes,  kilo, mega …… etc. This article covers the overview of some of these units and the convention which should be used for these units.

The very basic unit of time is second, is shortened as s.  The two basic information units are byte and bit, abbreviated as B (byte) and b (bit).  1 B is equal to 8 b. The other units are floating-point operations, abbreviated as a flop. A unit of computing speed is the number of floating-point operations per second i.e. flop/s. A unit for information transfer rate is the number of bytes per second i.e. B/s. The execution rate of a processor is often measured as million instructions per second i.e. MIPS.

The first unit which most of the time brings confusion in the computing world is kilo when to be considered as 1000 (decimal interpretation) and when to be considered as 1024 (binary interpretation).  The other confusion regarding the plural convention of the unit.

Ambiguity which we normally have are

The difference between kilo that is the decimal interpretation 10^3 and the binary interpretation 2^10 is only around 2% but this difference increases when it comes to mega, giga, and so on. So this ambiguity must be clarified. In computers binary interpretation is used when we talk about information transfer speed, storage like the size of memory, hard disk, etc, and decimal interpretation is often used when we talk about execution time, computational workload, etc.

Regarding the convention for the plural form of a unit, the unit will be pluralized when the whole word is used not when the abbreviation is used. For ex. 4 GB or 4 Gbytes or   4 Gigabytes all are same.  However, the conventions for plural form for the same 4 KBs or 4 Kbyte are not appropriate to use.

Posted in My articles | Leave a comment

CASS-2018 – Learning Experience

Hi,

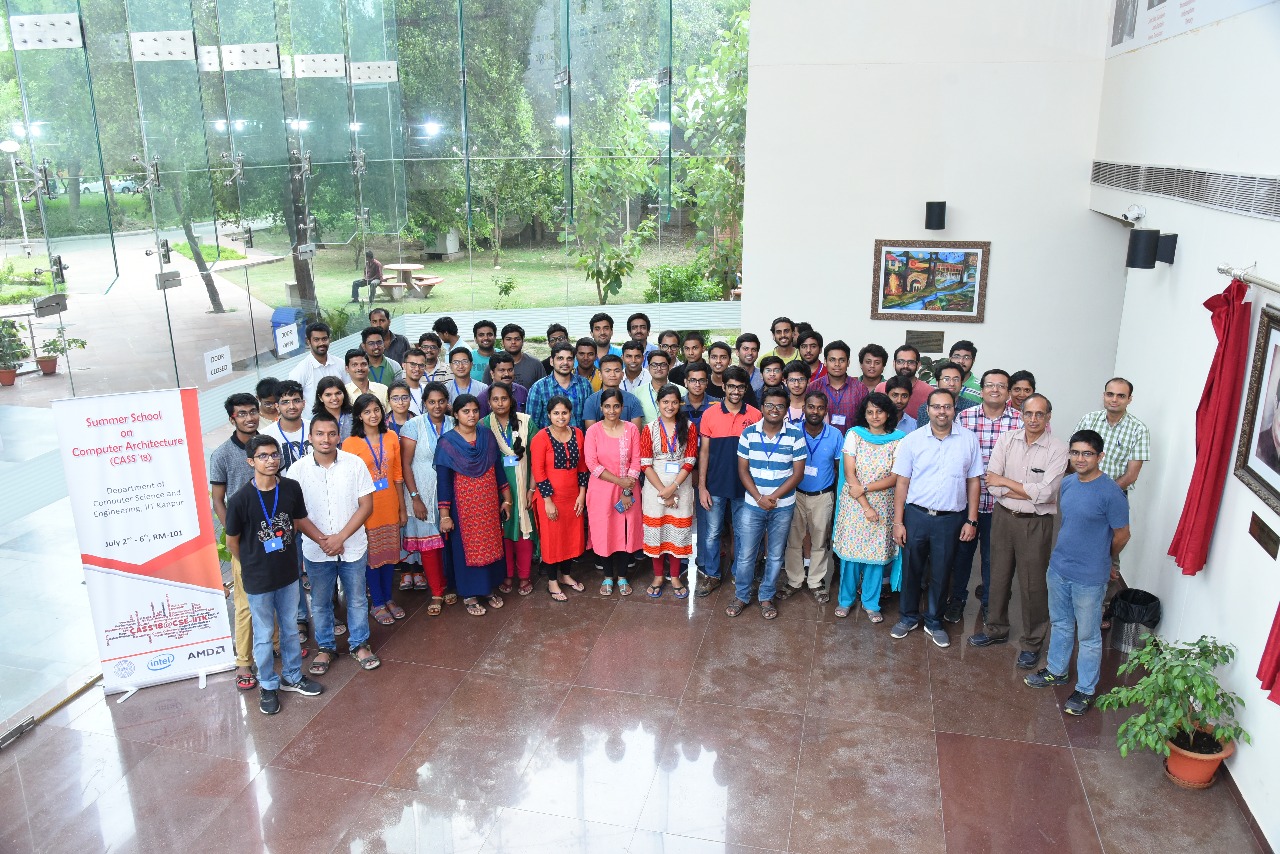
This summer I got an opportunity to attend school on computer architecture at IIT Kanpur. The goal of Computer Architecture Summer School (CASS-2018) was to provide an introduction to Computer Architecture and related areas to undergraduate students who have undergone basic training in computer organization. The summer school provided excellent ground for conglomeration of students, researchers, and industry which in turn provided the rich and great platform to exchange ideas, thoughts and knowledge in the area of Computer Architecture.

Attending this school not only provided me with an opportunity to learn more about the Computer Architecture, latest technologies and developments in associated area but also increased visibility in the area of Computer Architecture. This also gave me an opportunity to meet and learn from experienced people working in the area of computer architecture.

IMG-20180705-WA0002

I must say that the event was very well thought of and organized. The contents were very well-planned ranging from computer architecture to parallel programming models. The concept of lectures followed by respective hands-on session allowed us to experiment with architectural tools and simulators and understand the things better. The beauty of lectures, the way they were delivered, more interactions made us to think at every point why the things are the way they are. Entire team of CASS-2018 was very interactive and helpful in clearing our doubts at every point of time.

My attendance at this conglomeration also gave me direct access to presentations from many experts, gaining valuable information about what other people are doing and where they are focusing their efforts. This is especially important because of my desire to collaborate with others in this area.

Last, but not the least it is to be understood that this opportunity made a significant positive impact and in turn I’ll be able to more effectively contribute and disseminate knowledge in the areas of Computer Architecture.

I liked all the lectures and the way they were delivered but few will always be more interesting. For me it was the discussion on “why research?”

I would like to appreciate the initiative taken up by the team and efforts they had put to make this event successful. Also, I would like to thank for giving me an opportunity to attend and for the great hospitality they provided.

Thank you for such a great opportunity. I eagerly look forward to such events with advanced editions of this course in the near future!


Posted in Summer-school | Leave a comment

Installation of siesta-3.2 & TranSiesta with Intel MPI

Contents

  1. Prerequisites
  2. Installation steps for siesta
  3. Installation steps for transiesta
  4. Execution and Testing
  5. Known errors and solutions
  6. References

1. Prerequisites

  • MPI
  • BLAS

2. Installation steps for siesta

2.1 Download source code

http://icmab.cat/leem/siesta/CodeAccess/Code/downloads.html

2.2 Untar

$ tar -xvf siesta-3.2.tgz

2.3 Configure

Change the directory then execute the below command to configure

$ cd siesta-3.2/Src

$ export CC=icc

$ export FC=mpiifort

$ ./configure –enable-mpi –with-blas=/opt/intel/mkl/lib/intel64 –with-lapack=/opt/intel/mkl/lib/intel64 –with-blacs=/opt/intel/mkl/lib/intel64 –with-scalapack=/opt/intel/mkl/lib/intel64

it will  start an automatic scan of your system and try to build an arch.make for you. Check the arch.make file for compiler and library path.

One important compilation option is -DGRID_DP, which tells the compiler to use double precision arithmetic in grid-related arrays. Unless you find memory problems running siesta, we strongly recommend it, and we will likely make it the default in future versions. If you use GRID_DP, please note that it is advantageous to enable also PHI_GRID_SP, since the array that stores orbital values on the grid can safely be kept in single precision, with significant savings in memory and negligible numerical changes.

2.4 Compile  the siesta

$ cd siesta-3.2/Obj

$ cp siesta-3.2/Src/arch.make .

$ sh ../Src/obj_setup.sh

$ make

If successful will create “siesta” executable.

3. Installation steps for transiesta

Follow the same steps as mentioned in section 2 ” Installation Steps “. Only at the last step use ” make transiesta” instead of “make”. It will generate the executable “Obj/transiesta”.

4. Execution and Testing

4.1 Test siesta installation

$ mkdir h2o

$ cd h2o

$ cp siesta-3.2/Examples/H2O/h2o.fdf .

You need to make the siesta executable visible in your path. You can do it in many ways, but a simple one is

ln -s siesta-3.2/Obj/siesta .

$ cd siesta-3.2/Pseudo/atom

$ make

$ cd Tutorial/PS_Generation/O

$ cat O.tm2.inp

$ sh ../../Utils/pg.sh O.tm2.inp

Now there should be a new subdirectory called O.tm2 (O for oxygen) and O.tm2.vps (binary) and O.tm2.psf (ASCII) files.

$ cp O.tm2.psf siesta-3.2/h2o/O.psf

The same could be repeated for the pseudopotential for H, but you may as well copy H.psf from Examples/Vps/ to your h2o working directory.

Now you are ready to run the program:

./siesta < h2o.fdf | tee h2o.out

(If you are running the parallel version you should use some other invocation, such as mpirun -np 2 siesta).

After a successful run of the program, you should have several files in your directory including the following:

  • fdf.log (contains all the data used, explicit or chosen by default)
  • O.ion and H.ion (complete information about the basis and KB projectors)
  • h2o.XV (contains positions and velocities)
  • h2o.STRUCT_OUT (contains the final cell vectors and positions in “crystallographic” format)
  • h2o.DM (contains the density matrix to allow a restart)
  • h2o.ANI (contains the coordinates of every MD step, in this case only one)
  • h2o.FA (contains the forces on the atoms)
  • h2o.EIG (contains the eigenvalues of the Kohn-Sham Hamiltonian)
  • h2o.xml (XML marked-up output)

4.2 Test transiesta installation

$ cd Examples/TranSiesta
$ cd Elec
$ mkdir OUT_Test
$ cd OUT_Test
$ cp ../* .
$ transiesta < elec.fast.fdf > elec.fast.out

For parallel run

$ mpirun -np 2 transiesta < elec.fast.fdf > elec.fast.out

5. Known errors and solutions

6. References

  1. http://departments.icmab.es/leem/siesta/
  2. http://departments.icmab.es/leem/siesta/Documentation/Manuals/siesta-3.2-manual.pdf
  3. http://icmab.cat/leem/siesta/Documentation/Manuals/siesta-3.1-manual/node1.html
  4. http://icmab.cat/leem/siesta/Documentation/Manuals/siesta-3.1-manual/node7.html
Posted in HPC Applications | Leave a comment

NAMD v2.9 installation

Contents

1. Prerequisites
2. Installation steps
3. Execution and Testing
4. Known errors and solutions
5. References

1. Prerequisites

  • MPI
  • FFTW
  • TCL (optional)

2. Installation steps

2.1 Download NAMD source package

http://www.ks.uiuc.edu/Research/namd/

2.2 Untar, it creates directory NAMD_2.9_Source/

tar -xvf NAMD_2.9_Source.tar.gz

2.3 Compilation

2.3.1 Change to directory NAMD_2.9_Source

cd NAMD_2.9_Source

2.3.2 Modify the following files

  • NAMD_2.9_Source/Make.charm, mention charm directory

1 CHARMBASE = /opt/charm-6.5.0

  • NAMD_2.9_Source/arch/Linux-x86_64-icc.arch, mention charm architecture name

1 NAMD_ARCH = Linux-x86_64
2 CHARMARCH = mpi-linux-x86_64-ifort-mpicxx

Note : If charm++ built using IB ( ibverbs ) then use CHARMARCH=net-linux-x86_64-ibverbs-ifort-icc

  • NAMD_2.9_Source/arch/Linux-x86_64-icc.archLinux-x86_64.fft , edit fft library path

2 FFTDIR=/opt/intel/mkl    ## FFTW installation path
3 FFTINCL=-I$(FFTDIR)/include/fftw
4 #FFTLIB=-L$(FFTDIR)/lib -lrfftw -lfftw
5 FFTLIB=-L$(FFTDIR)/lib/intel64 -lrfftw -lfftw

  • NAMD_2.9_Source/arch/Linux-x86_64-icc.archLinux-x86_64.fft3 , edit fft library path

2 FFTDIR=/opt/intel/mkl ## FFTW installation path
3 FFTINCL=-I$(FFTDIR)/include/fftw
4 FFTLIB=-L$(FFTDIR)/lib/intel64 -mkl -lfftw3xf_intel
5 FFTFLAGS=-DNAMD_FFTW -DNAMD_FFTW_3
6 FFT=$(FFTINCL) $(FFTFLAGS)

  • NAMD_2.9_Source/arch/Linux-x86_64-icc.archLinux-x86_64.tcl, edit tcl library path

3 TCLDIR=/usr ## TCL installation path
4 TCLINCL=-I$(TCLDIR)/include
5 #TCLLIB=-L$(TCLDIR)/lib -ltcl8.5 -ldl
6 TCLLIB=-L$(TCLDIR)/lib64 -ltcl8.5 -ldl -lpthread
7 TCLFLAGS=-DNAMD_TCL
8 TCL=$(TCLINCL) $(TCLFLAGS)

2.4 Installation

2.4.1 If charm++ built using Intel  MPI and compilers

  • configure

./config <namd-install-dir>/Linux-x86_64-icc.mpi \
–charm-base /opt/app/charm-6.5.0/ –charm-arch   \
mpi-linux-x86_64-ifort-mpicxx  –with-fftw –with-fftw3  \                                  
–with-tcl 2>&1 | tee config-log-mpi.out

  • cd <namd-install-dir>/Linux-x86_64-icc.mpi
  • make 2>&1 | tee make-log.out

2.4.2 If charm++ built using Infiniband (IB) ibverbs and intel compilers

  • configure

./config <namd-install-dir>/Linux-x86_64-icc.ibverbs \
–charm-base/opt/app/charm-6.5.0 –charm-arch         \
net-linux-x86_64-ibverbs-ifort-icc –with-fftw –with-fftw3\
–with-tcl 2>&1 | tee config-log-net.out

  • cd <namd-install-dir>/Linux-x86_64-icc.ibverbs
  • make 2>&1 | tee make-log.out

2.4.3 If installation is successful charmrun and namd2 executable will be created.

3. Execution and Testing

3.1 Download NAMD benchmark from ApoA1 benchmark

http://www.ks.uiuc.edu/Research/namd/utilities/

untar tar -xvf apoa1.tar.gz

3.2 Execute using below command if NAMD is built using charm++ MPI communication layer

  • cd apoa1
  •  <namd-install-dir>/charmrun +p 2  <namd-install-dir>/namd2 ./apoa1.namd
  • It will create three output files namely apoa1-out.coor, apoa1-out.vel, apoa1-out.xsc

3.3 Execute using below command if NAMD is built using charm++ net (ibverbs) communication layer

  • cd apoa1
  •  <namd-install-dir>/charmrun +p 2 ++remote-shell ssh <namd-install-dir>/namd2 ./apoa1.namd
  • It will create three output files namely apoa1-out.coor, apoa1-out.vel, apoa1-out.xsc

4. Known Errors & Solutions

5. References

5.1 http://www.nic.uoregon.edu/tau-wiki/Guide:NAMDTAU

5.2 http://www.ks.uiuc.edu/Research/namd/2.10/features.html

5.3 http://www.hpcadvisorycouncil.com/pdf/NAMD_Best_Practices.pdf

5.4 http://www.ks.uiuc.edu/Research/namd/utilities/

Posted in HPC Applications | Leave a comment

charm++ – 6.5 installation using Intel MPI

Contents

1. Prerequisites
2. Installation steps
3. Execution and Testing
4. Known error and solutions
5. References

1. Prerequisites

  • MPI

2. Installation steps

2.1 Download charm

http://charm.cs.illinois.edu/software

2.2 Untar

tar -xvf  charm-6.5.0.tar.gz

2.3 If building with (Intel) MPI as communication layer and Intel compilers

  • Modify file charm-6.5.0/src/arch/mpi-linux-x86_64/conv-mach.sh , add  Intel MPI compilers and flags , modify the following lines

8 MPICXX_DEF=mpiicpc
9 MPICC_DEF=mpiicc

30 CMK_CPP_C=”$MPICC -E -DMPICH_IGNORE_CXX_SEEK -DMPICH_SKIP_MPICXX”
31 CMK_CC=”$MPICC $CMK_AMD64 -DMPICH_IGNORE_CXX_SEEK -DMPICH_SKIP_MPICX X”
32 CMK_CXX=”$MPICXX $CMK_AMD64 -DMPICH_IGNORE_CXX_SEEK -DMPICH_SKIP_MPI CXX”
33 CMK_CXXPP=”$MPICXX -E $CMK_AMD64 -DMPICH_IGNORE_CXX_SEEK -DMPICH_SKI P_MPICXX”

  • Modify file charm-6.5.0/src/arch/mpi-linux-x86_64/cc-mpicxx.sh , add  Intel MPI compilers and flags , modify the following lines

4 MPICXX_DEF=mpiicpc
5 MPICC_DEF=mpiicc

29 CMK_CPP_C=”$MPICC -E -DMPICH_IGNORE_CXX_SEEK -DMPICH_SKIP_MPICXX”
30 CMK_CC=”$MPICC $CMK_AMD64 -DMPICH_IGNORE_CXX_SEEK -DMPICH_SKIP_MPICX X ”
31 CMK_CXX=”$MPICXX $CMK_AMD64 -DMPICH_IGNORE_CXX_SEEK -DMPICH_SKIP_MPI CXX”
32 CMK_CXXPP=”$MPICXX -E $CMK_AMD64 -DMPICH_IGNORE_CXX_SEEK -DMPICH_SKIP_MPICXX”

2.4 If building with Infiniband (IB) ibverbs as communication layer and Intel compilers then no modification is required.

2.5  Change directory to charm directory

cd charm-6.5.0

2.6 Installation

  • Installing MPI version ie. MPI as communication layer and Intel compilers

./build charm++ mpi-linux-x86_64 mpicxx ifort \
–incdir=/opt/intel/impi/4.1.0.024/include64 \
–libdir=/opt/intel/impi/4.1.0.024/lib64 \
–with-production –build-shared 2>&1 | tee build-log.out

On successful completion creates directory  mpi-linux-x86_64-ifort-mpicxx/

  • Installing IB (infiband) ibverbs as communication medium and Intel compilers

./build charm++ net-linux-x86_64 icc ifort ibverbs –with-production –build-shared 2>&1 | tee build-log-ibverbs.out

On successful completion creates directory net-linux-x86_64-ibverbs-ifort-icc.

3. Execution and Testing

3.1 Testing installation of charm++ MPI version and Intel compilers

  • cd charm-6.5.0/mpi-linux-x86_64-ifort-mpicxx/examples/charm++/queens
  • make
  • ./charmrun ./pgm 12 6 +p2

3.2 Testing installation of charm++ IB (infiband) ibverbs and Intel compilers

  • charm-6.5.0/net-linux-x86_64-ibverbs-ifort-icc/examples/charm++/queens
  • make
  • ./charmrun ++remote-shell ssh ./pgm 12 6 +p2

4. Known error and solutions

4.1 Error 

/opt/intel/impi/4.1.0.024/include64/mpicxx.h(45): catastrophic error: #error directive: “SEEK_SET is #defined but must not be for the C++ binding of MPI”

#error “SEEK_SET is #defined but must not be for the C++ binding of MPI”

Solution 

  • Add flags -DMPICH_IGNORE_CXX_SEEK and -DMPICH_SKIP_MPICXX in file <charm-install-dir/tmp/cc-mpicxx.sh file. Refer section 2.3
  • Add flags -DMPICH_IGNORE_CXX_SEEK and -DMPICH_SKIP_MPICXX in file <charm-install-dir/tmp/conv-mach.sh file. Refer section 2.3

5. References

5.1 Download http://charm.cs.illinois.edu/software

5.2 http://www.hpcadvisorycouncil.com/pdf/NAMD_Best_Practices.pdf

Posted in HPC Applications | Leave a comment

Installation of OpenFOAM-2.2.1

Continue reading

Posted in HPC Applications | Leave a comment

VASP 5.3.3 Parallel compilation using Intel MKL, Intel MPI , Intel MKL FFTW

Contents

1. Prerequisites
2. Installation steps
3. Execution
4. Known error and solutions
5. References

  1. Prerequisites

  • BLAS
  • MPI
  • FFT ( one is provided with the package)

For my experimental setup I have used the following

    • Intel MKL 11.0
    • Intel MPI-4.1.0.024
    • Intel FFTW 3.x

2. Installation steps

2.1 Download following

    •  vasp.5.X.X.tar.gz
    •  vasp.5.lib.tar.gz

2.2 Untar these files

    •  tar -xvf vasp.5.X.X.tar
    •  tar -xvf 5.lib.tar

Two directories are created:

    •  vasp.5.lib/
    •  vasp.5.X.X/

2.3 Compile vasp.5.lib

  • Go to the vasp.5.lib directory, and copy the appropriate makefile.machine to Makefile.
cd vasp.5.lib
cp makefile.linux_ifc_p4 Makefile
  • Modify Makefile. Change below line in Makefile
19 FC=ifort
  • Compile and build type
make

2.4 Compile vasp.5.3

  • Go to the vasp.5.3 directory, and copy the appropriate makefile.machine to Makefile.
cd vasp.5.3
cp makefile.linux_ifc_p4 Makefile
  • Modify Makefile.
    • Makefile for k-point  . Below lines are uncommented  other are commented in Makefile
#-----------------------------------------------------------------------
# all CPP processed fortran files have the extension .f90
SUFFIX=.f90
#-----------------------------------------------------------------------
# fortran compiler and linker
#-----------------------------------------------------------------------
#FC=ifort 
# fortran linker
#FCL=$(FC)
# this release should be fpp clean
# we now recommend fpp as preprocessor
# if this fails go back to cpp
CPP_=fpp -f_com=no -free -w0 $*.F $*$(SUFFIX)

CPP = $(CPP_) -DHOST=\"LinuxIFC\" \
-DCACHE_SIZE=12000 -DPGF90 -Davoidalloc -DNGXhalf \
# -DRPROMU_DGEMV -DRACCMU_DGEMV
FFLAGS = -FR -names lowercase -assume byterecl -heap-arrays
#-----------------------------------------------------------------------
# optimization
#-----------------------------------------------------------------------
# ifc.9.1, ifc.10.1 recommended
OFLAG=-O2 -ip -heap-arrays
OFLAG_HIGH = $(OFLAG)
OBJ_HIGH = 
OBJ_NOOPT = 
DEBUG = -FR -O0
INLINE = $(OFLAG)
#-----------------------------------------------------------------------
# the following lines specify the position of BLAS and LAPACK
# we recommend to use mkl, that is simple and most likely 
# fastest in Intel based machines
#-----------------------------------------------------------------------
# mkl path for ifc 11 compiler
#MKL_PATH=$(MKLROOT)/lib/em64t
MKLROOT=/opt/intel/mkl
# mkl path for ifc 12 compiler
MKL_PATH=-L$(MKLROOT)/lib/intel64
MKL_FFTW_PATH=$(MKLROOT)/interfaces/fftw3xf/
# BLAS
BLAS= -L$(MKLROOT)/lib/intel64 -lmkl_intel_lp64 -lmkl_intel_thread -lmkl_core -liomp5 -lpthread

LAPACK= $(MKL_PATH)
LINK =
#-----------------------------------------------------------------------
# fortran linker for mpi
#-----------------------------------------------------------------------
FC=mpiifort
FCL=$(FC)

CPP = $(CPP_) -DMPI -DHOST=\"LinuxIFC\" -DIFC \
-DCACHE_SIZE=4000 -DPGF90 -Davoidalloc -DNGZhalf \
-DMPI_BLOCK=8000 -Duse_collective -DscaLAPACK
## -DRPROMU_DGEMV -DRACCMU_DGEMV
# usually simplest link in mkl scaLAPACK
BLACS= -lmkl_blacs_intelmpi_lp64
SCA= -lmkl_scalapack_lp64 $(BLACS)
LIB = -L../vasp.5.lib -ldmy \
../vasp.5.lib/linpack_double.o \
$(SCA) $(LAPACK) $(BLAS)
#-----------------------------------------------------------------------
# parallel FFT
#-----------------------------------------------------------------------
# you may also try to use the fftw wrapper to mkl (but the path might vary a lot)
# it seems this is best for AMD based systems
FFT3D = fftmpiw.o fftmpi_map.o fftw3d.o fft3dlib.o
INCS = -I$(MKLROOT)/include/fftw
#-----------------------------------------------------------------------
# general rules and compile lines : No change below this
#-----------------------------------------------------------------------
  • Type make to compile , if sucessful vasp executable will be created

make

  • Makefile for gamma points

For gamma points needs to add only one additional flag to CPP other fields are same as K-point Makefile. Add flag -DwNGZhalf

Full preprocessor flag list:

CPP    = $(CPP_) -DMPI -DHOST=\"CrayXE-GNU\" \
          -DNGZhalf \
          -Dkind8 \
          -DCACHE_SIZE=2000 \
          -Davoidalloc \
          -DRPROMU_DGEMV  \
          -DMPI_BLOCK=100000 \
          -Duse_collective \
          -Drandom_array \
          -DscaLAPACK

Above is for multiple k-point version of VASP. For the GAMMA-point only code you would add -DwNGZhalf ; for the noncollinear versions you would remove -DNGZhalf.; and for the Anderesen thermostat version you would add -Dtbdyn.

  • Type make to compile , if sucessful vasp executable will be created

make

3. Execution

Use below command to execute in parallel. Change the directory to the input data directory . From there execute below command

mpirun -np <Num-procs> <VASP_directory>/vasp

4. Known error and issues

4.1 Error

forrtl: severe (174): SIGSEGV, segmentation fault occurred
Image              PC                Routine            Line        Source
libmkl_avx.so      00002B8708C1A0BB  Unknown               Unknown
Unknown
libmkl_core.so     00002B87039E8EFE  Unknown               Unknown

Solution : The error is because of Intel MKL FFTW3.x linking . As Intel MKL merge the FFTW3.x interfaces in mklcore libraries , so no need to link it with  libfftw3xf_intel.a. So remove this library from Makefile.

https://nesccdocs.rdhpcs.noaa.gov/wiki/index.php/Using_Intel_MKL#Linking_with_FFT.2C_and_the_FFTW_interface

4.2 Error 

> > send desc error
> > [8] Abort: [13] Abort: Got completion with error 12, vendor code?, dest
> > rank> at line 870 in file ../../ofa_poll.c

Solution

The issue is that the submitted jobs require a large amount of memory,
and there are problems with the stack.
I have found different possible solutions to this problem:
1. Including “ulimit -s unlimited” in the .bashrc or in the .bash_profile files .
2. Including the option “-heap-arrays” when compiling the application.
3. Including the option “-mcmodel=large” when compiling the application.

I used solution 2

5. References

5.1 Intel FFTW3.x linking

https://nesccdocs.rdhpcs.noaa.gov/wiki/index.php/Using_Intel_MKL#Linking_with_FFT.2C_and_the_FFTW_interface

5.2 VASP

http://cms.mpi.univie.ac.at/vasp/vasp/Installation_VASP.html

Posted in HPC Applications | Leave a comment